


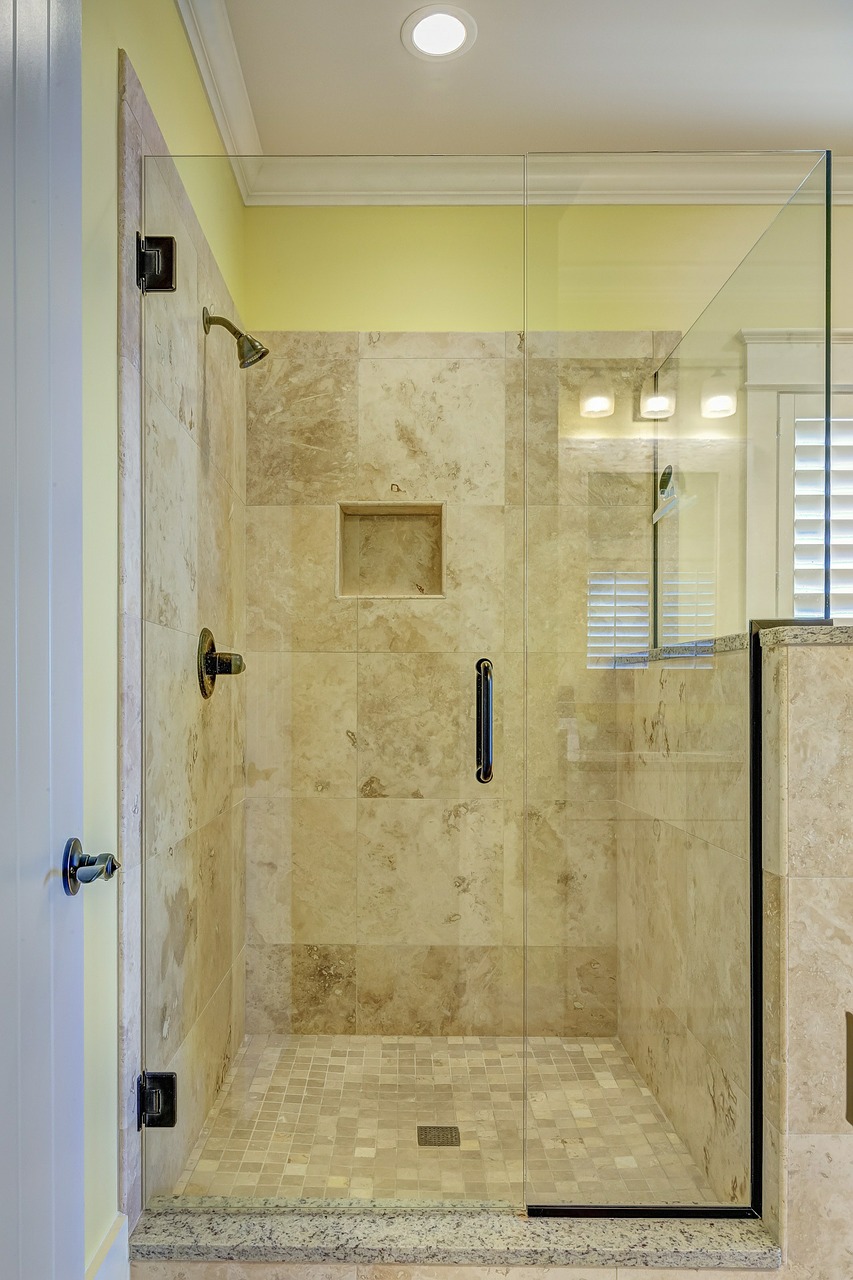
Most Houston shower doors have seals on the bottom and sides to help stop leaks, but you need to replace these seals from time to time.
If you’ve noticed water on the floor after your shower, you may need to replace the seals on your Houston shower doors. Many people don’t realize they need to replace the seals until they break and allow water to leak out of their shower enclosure. Replacing the seals and sweeps for your shower is a pretty easy project that you can DIY to help prevent leaks, water damage, and slip hazards in your bathroom. In this article we’ll explain how to replace the shower enclosure seals to keep your shower in great condition.
What are Seals for Houston Shower Doors?
First, you might not even know what a shower door seal is. After all, they’re pretty unnoticeable most of the time. If you take a look around your Houston frameless shower doors, you might see some clear plastic or rubber pieces near the bottom of the door and on the sides. These help keep water inside your shower enclosure. There are many different types of seals your shower enclosure might use to achieve a watertight seal. In most cases, you will have a sweep at the bottom of the shower door. You may also have seals on either side of the door. This all depends on the design of your shower enclosure.
Shower door seals are generally made of either acrylic plastic or rubber. Most of them are made of clear materials so they don’t interfere with the gorgeous look of your shower glass. Over time, the plastic can break down, which means most homeowners need to replace the seals long before they need to replace the glass for their shower enclosures.
Tips for Shower Sweep Maintenance
Of course, just like with your Houston shower doors, there are some things you can do to help extend the lifespan of your shower enclosure seals. Here are some tips:
- Clean shower seals at least once a week with a gentle cleaner like diluted vinegar
- Inspect seals for cracks, discoloration, leaks, and other signs of wear and tear once a month
- Replace seals every 1-2 years or once they show signs of wear or breakage
It’s important to note that shower seals can be a place where minerals, mold, and mildew can collect if you don’t clean them regularly. These can make them wear out or break faster. So, make it a priority to clean the seals every time you deep clean the shower. In most cases this will be once a week or more. Just don’t use harsh cleaning supplies or tools, as this can damage the plastic.
Finding Replacement Seals for Houston Frameless Shower Doors
If you’ve noticed that your shower door seals have seen better days, then it’s time to replace them. Of course, finding the right replacement is important. In most cases, you’re probably going to need to order the replacements. However, your local hardware store may have some in stock, and you might be lucky and find the exact right seals for your shower enclosure.
If you take a look at all the options, you may have noticed that there are many different sizes and designs to choose from. Ordering the wrong size or design may make your shower enclosure more prone to leaks. So, first make sure the design looks similar. Then, you’ll need to have some measurements to get the exact seal you need for your shower door.
What to Measure
To find the right seals, you’ll need to take a few measurements. So, make sure you have a measuring tape on hand, as well as a piece of paper or your phone to record the measurements.
You may have noticed that most shower door seals are c-shaped. This is because they fit around the width of the glass. Most shower glass is either ¼”, ⅜”, or ½”. You’ll need to know how thick the glass is to order a new seal. If you’re not sure, that’s where your handy dandy measuring tape comes in. Measure the thickness so you can choose the right shower seal.
Also, as you look at shower seal options, you have probably noticed there’s a little lip that sticks out from the seal. This is called a drip edge, and different showers need different lengths for the drip edges. Therefore, you’ll need to know the right size for this as well. To find this out, you’ll need to take some measurements as well. If you’re replacing the bottom sweep on your Houston shower doors, then you’ll need to measure the gap between the floor or curb and the bottom of the door. For side seals, you want to measure the gap between the side of the door and either the wall or glass panel it’s next to. Measuring these gaps gives you the size of drip edge you need.
Of course, you’ll need to know how long of a strip to order as well. Now, since most shower enclosures are custom-built, you may not be able to order the exact length you need for your door. So, you may need to order a longer piece and trim it down to size. To make sure you order a long enough piece, measure the length of the area where you need to replace the seal. For the bottom, measure horizontally from side to side. For the side, measure from top to bottom.
How to Replace Bottom Seal for Houston Shower Doors
Once you have your replacement shower door seals, then you can replace the old ones. To replace the bottom sweep, you’ll need a few things:
- Your favorite shower glass cleaner and a cloth
- A pen or marker
- Scissors, cutting pliers, or a utility knife
- Measuring tape
Start by measuring the length of the bottom edge of the door. You may already have this measurement from earlier, but if not or for extra caution go ahead and measure again.
Then mark that measurement on the seal itself with your writing implement. Now, some resources say to use the old seal as a template for cutting the new seal. However, we don’t recommend that because the plastic can shrink over time. If you cut the seal too short, this can leave a gap where water can leak, so it’s usually better to be safe than sorry and use measurements from the actual glass, rather than the old seal.
Once you’ve marked the measurement on the new seal, cut it to size. It’s usually a good idea to cut the seal a little long, just in case. You can trim off any excess a little later.
Remove the old seal by pulling it downward near the edge of the door. The seal will usually slide right off, as they’re held in place by the tension of the plastic. However, sometimes hard water minerals can make it stick. If you run into this, you might need a little patience and muscle. Just don’t pull so hard you damage the glass or the hardware.
Next, you want to clean the door where the old seal sat. You may encounter hard water stains, mildew, soap scum, or mold. You want to remove that before you install the new seal. So, grab your favorite shower glass cleaner and a microfiber cloth and give the area a good scrub.
After you clean and dry the bottom of the door, all you need to do is push the seal on with the drip edge facing the shower enclosure. You’ll probably need to use firm pressure to get the new seal on completely.
When it’s in place, you might notice the seal overhangs the door slightly, so you’ll need to trim away any excess. After that, you’re all done!
How to Replace Side Seals for Houston Shower Doors
Some shower enclosures also have side seals to help stop water from splashing outside of the shower. You may have one or two seals that sit vertically on the door that you will also need to replace regularly to help keep your shower watertight. Replacing these seals is usually very similar to replacing the bottom sweep, with just a few differences, depending on whether it’s the hinge side or the door jamb side.
Another important thing to note is that when installing new side seals for your shower door, you need to have the bottom seal fitted. This is because the side seals run from the top of the shower door down to the top edge of that bottom seal. If you’re replacing all the seals at once, this means you need to do the bottom sweep first.
Door Jamb
Your Houston shower doors may also have seals on the non-hinge side. This is called the door jamb seal. Replacing the door jamb seal on your shower enclosure is very similar to replacing the bottom sweep. You’ll need to remove the old one, cut a piece to size, clean the area, and push the new seal onto the glass. One key difference is that the drip edge for door jamb seals typically needs to sit further away from the shower enclosure. This is because the lip helps stop the glass from swinging inward.
Hinge-Side Seal
Just like you can have a door jamb seal, your shower door may also have a seal on the side where the hinges are. If so, replacing them is still really similar to replacing the other seals. The main difference is you’ll need to account for the hinges. This means you’ll need to cut the seals into multiple pieces (usually 3) as well as make notches in the seals to accommodate the hinge hardware. Then you can press the pieces on with the drip edge facing toward the shower to keep water inside the enclosure.
Glass Experts at Apple Glass Company
If you need high quality glass installation, repair, and replacement, call our team at Apple Glass! We offer a wide range of glass services, from shower door installation and mobile windshield repair to residential glass repair in The Woodlands and Houston. Call us now at (713) 680-1400 in Houston or (281) 296-0600 in The Woodlands for a free quote!
